Monday, March 31, 2014

The Cody Collection

Welcome to Crafting with Steph!

In my last post, I gave out a pattern on making dog sweaters (for Yorkies and other small dogs). Recently, I have knit a few more sweaters using the same pattern, and I would like to share my accomplishments with you.

So, without further ado, here they are:


For this sweater, I used Red Heart Super Saver yarn in Glowworm, Shocking Pink, and Turquoise.


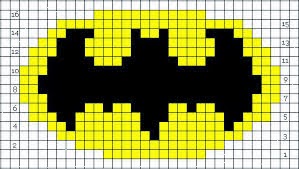
The SuperMan pattern I found on Google Images, and it works terrific!


We have a lot of fun with our dog at my house, and we pretend that he has multiple personalities. I am working on writing a book all about him, and I hope to publish it one day. Anyway, some of his aliases are Cody the Spy, Cody the Space Alien (from the planet Cuteon- you can read more about that at codytheyorkie.blogspot.com, BatCody, and Darwin, the professor from England. 

So, I thought what better than to add another alias to him, and make his Sailor Cody, loyal sea dog in Her Majesty's navy (because he's a Yorkie, which originated from England, duh). 

After making the back, with this lovely pattern (which, of course, I tweaked):

I decided that the front (belly part), had to be extra special. I had already done stripes, so this time, I chose to inscribe Cody's alias on it too. 

I went on to braceletbook.com where I made a special pattern for the front. 


For this one, I knit the sweater in Red Heart Super Saver Peruvian Print. I didn't use any special patterns, so I just knit the whole thing with one yarn.


So, there you have it. The Cody Collection!

- steph365 3/31/14

Thursday, March 6, 2014

Yorkie Batman Sweater

Hello and welcome back to Crafting with Steph!

Today, I have another knitting pattern to share! This one is a sweater I made for a very important friend of mine- my dog, Cody (you can learn more about him on his blog, codytheyorkie.blogspot.com). 


I used Red Heart Super Saver Yarn in Bright Yellow, Turquoise, and Shocking Pink, and size 9 US knitting needles.


My sweater was made to fit my dog, who is a size small in dog. 


We will start with the back of the sweater (the part on the dogs back). To begin, cast on 40 stitches. 

Knit 10 rows of knit 2, purl 2. 


After that, knit for 10 rows in stockinette stitch.


On the 11th row, start this pattern:


After you have finished the pattern, knit for 8 more rows. 

On the ninth row, decrease 4 stitches by knitting 2 together four times. Do this for the 10th and 11th rows too, so that you have decreased 12 stitches in total, leaving you with 28 stitches on your needle. 

Knit 2 more rows, and then switch to the knit 2, purl 2 technique for 10 rows. 

Bind off. Sew in tails. 


For the front of the sweater (the part on the dog's belly), you will need to cast on 30 stitches. 

As in the back, you will need to knit the first 10 rows in knit 2, purl 2. 

I did this side of the sweater in stripes, so after the first 10 rows in yellow, I switched to blue yarn. 

After knitting 10 rows in blue stockinette stitch, I switched back to yellow, in which I knit another 10 rows. 

Next, I switched to pink. I knit 3 rows, and on the 4th row, I decreased 4 stitches by knitting 2 together 4 times. 

I knit the 5th row, and on the 6th row, I decreased 2 stitches. 

I knit 7-9 rows, each with 22 stitches on them. 

On the tenth row, I added 6 stitches by using the MAKE 1 technique. I knit 3, made 1, knit 3, made 1, knit 3, made 1, knit 3, made 1, knit 3, made 1, knit 3, made 1, knit 4, made 1. This gave me back a total of 28 stitches.

Switch back to yellow, and knit 10 rows in knit 2, purl 2. 

Cast off, and sew in all your tails. 


Now, you're ready to finish your dog sweater. With both front sides of the sweater facing each other, sew them together. The top of the back and the top of the front should be equal. Make sure to leave space where we decreased for the dog's front leg holes. Sew along the side of the leg hole on one side, to reinforce it. Do this on both sides.


After you finish sewing the sides, sew in your tails. Your new dog sweater is ready for your furry friends to wear!

Enjoy!  


- steph365 3/6/14

Thursday, February 27, 2014

Divergent Dauntless Pillow

Hi and welcome back to Crafting with Steph!

Sorry I haven't posted in a while, but life has been pretty hectic. 

Today, I have a new pattern to share- more pillows! Yay!!!

I read the Divergent series last year, and thought they were pretty good. Recently, a friend of mine asked me to knit her a Divergent Dauntless pillow, after seeing my Mockingjay Hunger Games one. 

I scoured the internet for Divergent patters, but, alas, there were none (except for scarf patterns, which I didn't really need, but they looked cool, so I might make one in the future). 

So, what did I do? I searched BraceletBook.com, that's what I did! If you read some of my previous posts, you'll know that I get a lot of my patterns from there. The pattern I found needed a bit of tweaking, but with a bit of patience, I got it to my liking.

Here's the pattern from bracetbook and the link http://www.braceletbook.com/pattern_alpha/11787.html:

Alpha Pattern #11787 added by oliveiz44

And here's my tweaked knitting version:


To make the pillow a 50 x 50 like my other ones, I first knit 11 rows, then the motif, and then I knit another 10 rows before casting off.  

After you knit both sides, you are ready to make the pillow. 

First, turn both front facing sides toward each other.

Thread a yarn needle with the color yarn of your pillow, and sew three sides of the pillow closed.

Turn the pillow right side out and fill with stuffing.

Sew the last side closed.

TA-DA- you have a pillow (the stuffing will even out eventually)


*warning- these are decorative pillows- they are not meant to be washed in a machine

- steph365 2/27/13

Wednesday, January 15, 2014

Fingerless Gloves Knitting Pattern

Hello, and welcome back to Crafting with Steph.

I know I haven't posted in a while, but that's because I was really busy. Between school, a road trip to Florida, and other activities, I've had no time to write. I apologize.

Since I live in Chicago, where it's super cold in winter, I decided to give a shot at knitting gloves. Knitting fingers seemed to hard, and I kinda wanted to have my fingers free to play guitar and stuff, so I decided on making finger-less gloves. I tried once last year, but I used a different pattern that could be knit on two needles. After knitting a square, you would simply fold it in half and sew the side shut. I really didn't like them that much, because I wanted to have a thumb gusset. So, after searching the web for patterns, I found one I liked, but I improvised it a bit. 

Fingerless Gloves Knitting Pattern


Supplies:


4 double pointed needles, size 2 or 3. 
I used Lily Sugar n Creme American Stripes Yarn. It is a 100% cotton, worsted weight, 4 ply yarn.

Glove 1:

Cast on 40 stitches on a set of 3 double pointed needles

With the fourth needle, knit 10 rows of *knit 1, purl 1*

Knit 8 rounds of plain

Thumb gusset:

Knit 17 stitches of first round. Place marker, make one, knit one, make one, place marker. Knit rest of round.

Knit 1 round.

Knit to marker, slip marker, make 1, knit 3, make 1, slip marker. Knit rest of stitches in round.

Knit 1 round.

Knit to marker, slip marker, make 1, knit 5, make 1, slip marker. Knit rest of round.

Knit 1 round.

Knit to marker, slip marker, make 1, knit 7, make 1, slip marker. Knit rest of round.

Knit 1 round.

Knit to marker, slip marker, make 1, knit 9, make 1, slip marker. Knit rest of round.

Knit 1 round.

Knit to marker, slip marker, make 1, knit 11, make 1, slip marker. Knit rest of round.

Knit 1 round.

Knit to marker, slip marker, make 1, knit 13, slip marker. Knit rest of round. There are now 14 stitches between the markers.

Knit 2 rounds.

Knit to marker. Place 14 stitches on holder.

Cast on 2 stitches and continue knitting round. 42 total stitches.

Knit 7 rounds plain.

Knit in "knit 1, purl 1" stitches for 10 rows.

Bind off.

To finish the thumb, move the 14 stitches off the holder and onto three of the double pointed needles.

Pick up the 2 stitches you made earlier.

You now have 16 stitches with which to make the thumb.

Knit 5 rounds.

Bind off.

To finish the glove, sew in all the ends.

Glove 2:

Repeat same steps as above.


I hope you have as fun of a time making these gloves as I had.

Thanks for reading, and I hope to hear from you soon. Feel free to leave comments below, and if you have an awesome pattern you would like to be featured here at Crafting with Steph, contact me at iovescu.stephanie360@gmail.com

-steph360 1/15/14

Monday, November 25, 2013

My Favorite Things Scarf Part #3

Hello again and welcome back to Crafting with Steph!!! 

Today, I did it!!! I finally did it!!!

What did I do?

I found this pattern:


YAY!!!!!

You have no idea how long I searched for this pattern. I couldn't find it anywhere, but now I did!!! Yay!!!!

I can't wait to add this to the "My Favorite Things" Scarf!!!!

More to come once I add it to the scarf :)


How is your scarf coming along? What patterns are you using? Feel free to comment below and share your thoughts and patterns with me :)

-steph 11/25/13

Tuesday, November 5, 2013

Crafting Humor

Hello and welcome back to Crafting with Steph :)

Today, I have some humor to brighten up your day :D


- steph 11/05/13

My Favorite Things Scarf (Part #2)

Hi again :)

Here are some more knitting charts that you can use for the "My Favorite Things" Scarf:


More coming soon ;)

-steph 11/05/13